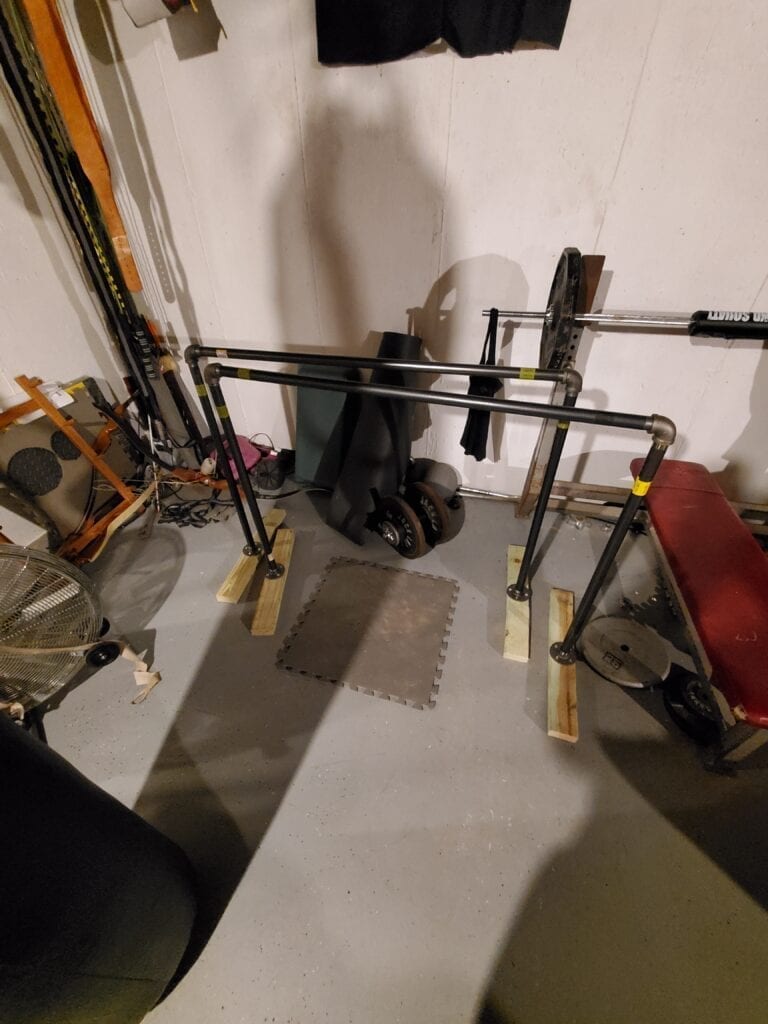
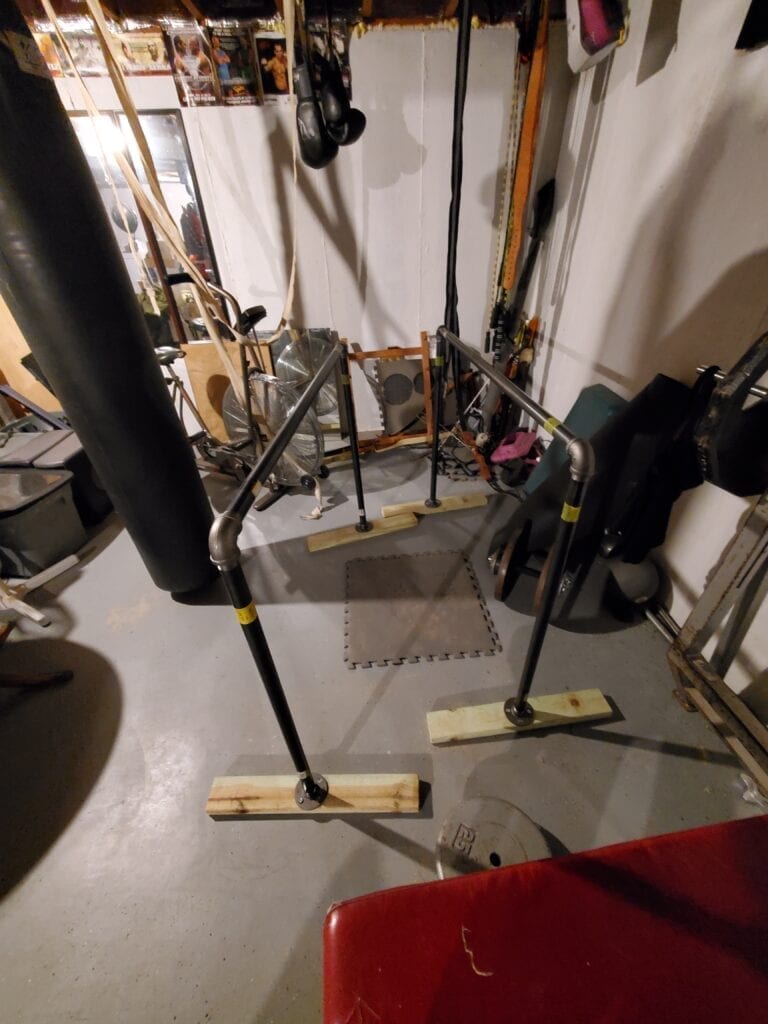
One of the best bodyweight exercises besides a chin-up bar is a dip station. No home gym is complete without one. I’ve been re-falling in love with all bodyweight exercise and a dip bar is a must!


Below is an easy do it yourself project that when you are done, you will have a dip bar that will be super functional and will last a lifetime.
So let’s get building one…
What Your Going To Need
I recommend getting the 1″ black pipe over the 3/4″ black pipe as I prefer the thicker diameter on my palms when lifting my body weight. I feel the 3/4″ is less comfortable on my palms. When you go to the store pick up both sizes and see which one you prefer and imagine your body weight pressed on your palms.
The drawback of the 1″ is it is more expensive than the 3/4″. As you have more material in the 1″. Also the 3/4″ you could buy athletic tape and wrap it around the horizontal bars for a more comfortable grip.
Also make sure the ends are threaded on both ends.
These materials can be found at your local box store or hardware stores, like Ace True Value, Lowes, Home Depot, and Menards.
- 2 – 48″ This is the horizontal bars and you could make this smaller, like to 36″, or 24″ it’s up to you but if you leave at 48″ you can do reverse rows from underneath. I like the option of doing another bodyweight exercise so I stuck with 48″.
- 4 – 36″
- 4 – 90 degree elbows
- 4 – Floor flanges
- 1 – 8ft 2×4 cut to 24″ lengths (End up with a quantity of 4)
- 16 – #14 Screws 1 1/2″ long
Tools Needed
- Phillips Screwdriver or driver
- Drill
- 5/32″ drill bit
- Hand saw or miter saw
- Pencil
- Safety glasses (safety first)
Total Cost $$$
Depending on your area prices may vary accordingly, I spent around $100.00 on my homemade dip station.
Believe me, I thought it was going to be a lot cheaper than this as I just grabbed the materials and had a shook at the checkout. It might have been better to buy a dip bar from a store as I see the prices are cheaper on some models.
But at least I know that this dip bar I built will last a lifetime. It is not going to ever break!
You can price the items out before purchasing them, then research prebuilt dip bars and compare prices, size, shipping and handling, and versatility to come up with the best deal for yourself.
For versatility for example with the one I built I can do dips, push ups, and body weight rows.
Now Assembly
I think it would be easiest to start by grabbing the horizontal bars (48″ length) and spin on your 90-degree elbows on both ends.
Then grab the 36″ bar and attach it to the elbows that are attached to the 48″ bar.


The take the floor flanges and screw them on to end of the 36″ bar.
Using the extra leverage you get from being almost fully assembled make sure all connections are tightened.
Now cut the 8 foot long 2×4 into 4 equal lengths, this should be 24 inches. then mark the centers at 12″
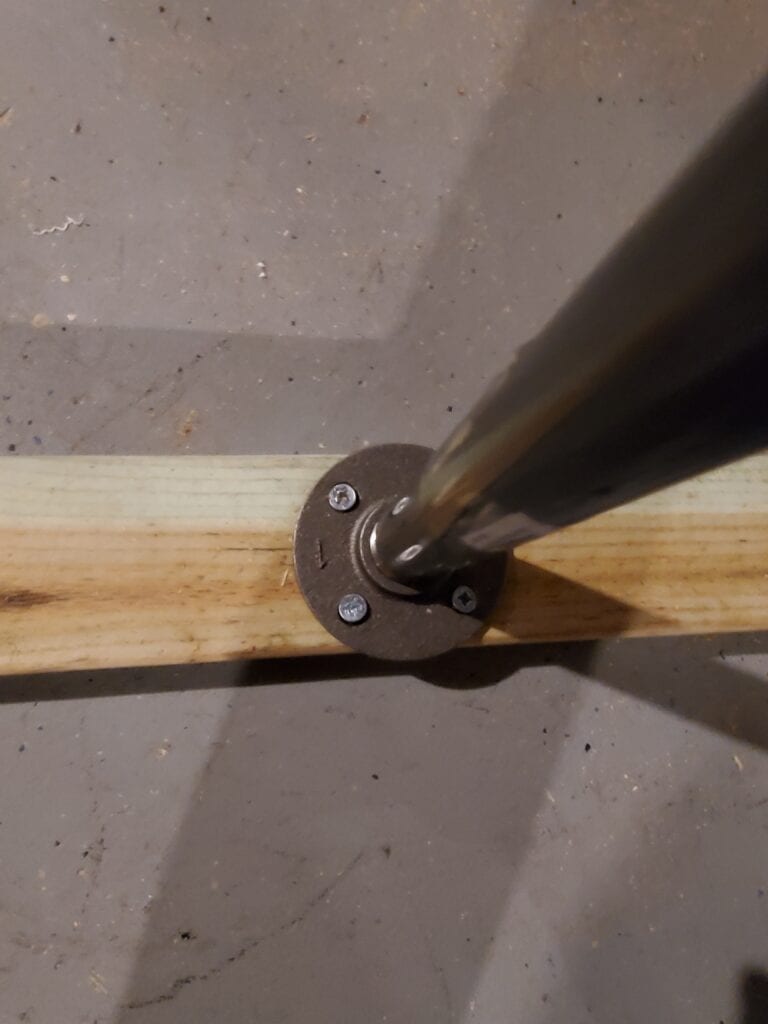
Center the floor flanges into the middle of the 2×4 mark the holes with a pencil then drill pilot holes into 2×4’s. Drill the pilot holes with the 5/32″ drill bit.
Then screw in the #14 screws to the floor flanges to 2×4’s.
When the 2×4 feet are on you can tighten the floor flanges to the pipe more by twisting the 2×4’s to get a real tight fit.


Dipping
To get the optimal width apart, just adjust the 2×4’s overlap the ends instead of butted up against each other.
This design provides a very balanced and stable platform for dipping. I can swing my self side to side and the bars remain in place.
More Homemade Workout Equipment
For more ideas on other homemade workout equipment head on over to my other page here. Jumping rope is a fantastic weight loss exercise.
How To Build A Jump Rope Platform
Looking For A Bodyweight Workout Program?
A bodyweight program I fell in love with is the Kinobody Bodyweight Mastery Program. This is a well thought out progressive program to get you stronger and fit. You can read my full review here Kinobody Bodyweight Mastery Program review.
Now Get Dipping
Let me know how it works out for you. I just love my dip station!
Share This:
